Blog
This is a private homepage... ;)
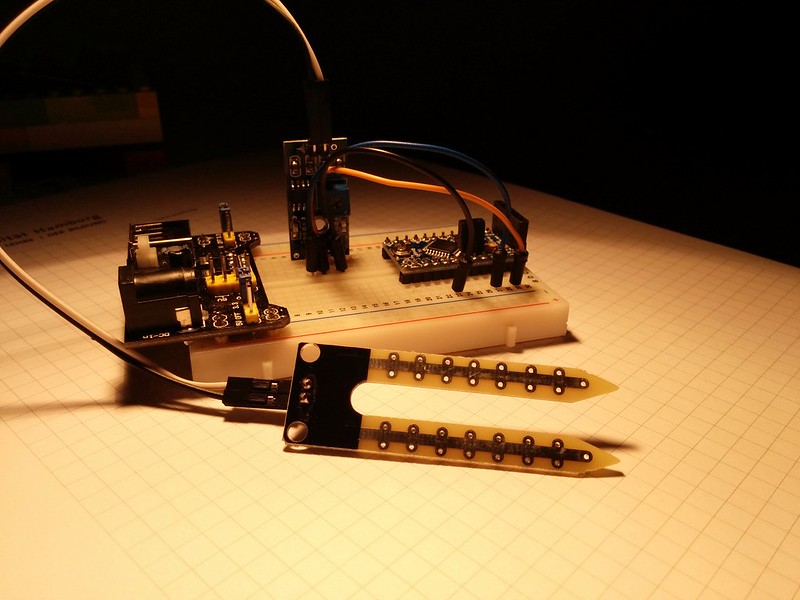
Arduino Water Sensor for Houseplants
This is just a very minimal example on how to use these kind of sensors. I just read a value from an analog pin every 2 seconds and print it out to serial.
These sensors are available very cheap online and are easy to use... So, now my plants go online... :)
My code:
const int analogIn = A0;int sensorValue = 0;void setup() {Serial.begin(9600);}void loop() {sensorValue = analogRead(analogIn);Serial.print("Sensor: ");Serial.println(sensorValue);delay(2000);}
And now to something completely... Need to learn how to add a ground plane in Eagle... ;)
Arduino 3.3V BMP180 I²C Pressure Sensor
I got a BMP180 pressure sensor today and gave it try. It was very easy to get it running using some free libraries from the web.
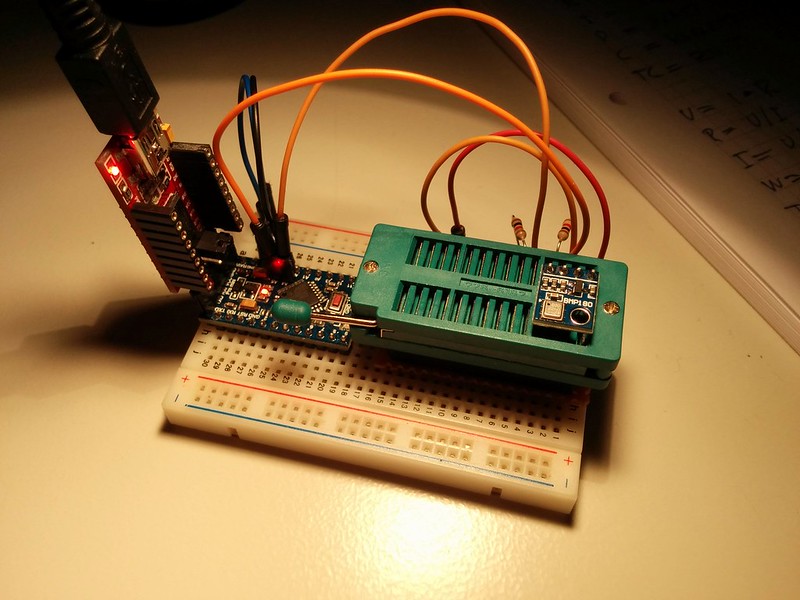
Don't wonder about the fat green socket where the BMP180 is inserted. I use this normally for attaching IC's to my breadboard and making them easily removeable without breaking stuff. IC's could sometimes be hard to remove from a breadboard, especially when the breadboard is unused... ;)
Since the BMP180 is an I²C device it ist very easy to connect it to the Arduino. Just be sure to add pull-up resistors to SCL and SDA. I am using 1K resistors and everything works fine.
Also be sure what kind of breakout board you have. I am using a very cheap model without voltage regulation so mine needs to be driven by a 3.3 Volt Arduino. If you want to drive this with a 5 Volt Arduino you will need to make use of a logic level converter. There are very nice breakout boards available with voltage regulation on-board! Take a look at the link below.
My code:
#include <Wire.h>#include <Adafruit_Sensor.h>#include <Adafruit_BMP085_U.h>Adafruit_BMP085_Unified bmp = Adafruit_BMP085_Unified(10085);void setup(void) {Serial.begin(9600);Serial.println("Arduino BMP180 Pressure Sensor");Serial.println("");bmp.begin();}void loop(void) {sensors_event_t event;bmp.getEvent(&event);if (event.pressure){Serial.print("Pressure: ");Serial.print(event.pressure);Serial.println(" hPa");}else{Serial.println("Sensor error");}delay(1000);}
Links:
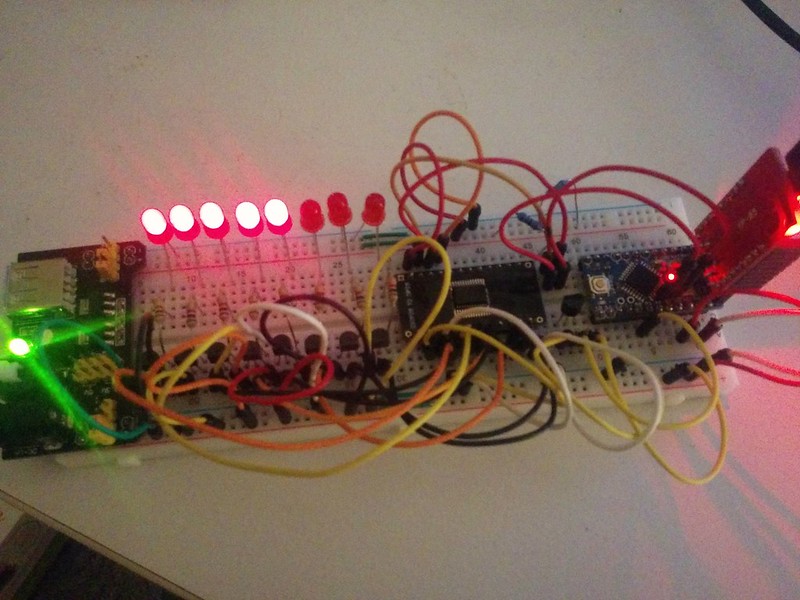
Arduino PCF8575 8xLED LM35 Thermometer
My code:
#include <Wire.h>// Set I2C addressint address = 0x20;int samples = 2;int collectDelay = 1000;int ledPin = 13;int tempPin = 0;float tempC = 0;void setup() {pinMode(ledPin, OUTPUT);Wire.begin();pf575_write(word(B11111111,B11111111));delay(200);pf575_write(word(B00000000,B11111111));delay(200);pf575_write(word(B11111111,B11111111));delay(200);pf575_write(word(B00000000,B11111111));delay(200);pf575_write(word(B11111111,B11111111));delay(1000);}void loop() {tempC = 0;for(int i = 0; i <= (samples - 1); i++) {tempC = tempC + ((5.0 * analogRead(tempPin) * 100.0) / 1024.0);digitalWrite(ledPin, HIGH);delay((collectDelay / 2));digitalWrite(ledPin, LOW);delay((collectDelay / 2));}tempC = tempC / (float)samples;if(tempC > 21) {pf575_write(word(B11111110,B11111111));}if(tempC > 23) {pf575_write(word(B11111100,B11111111));}if(tempC > 25) {pf575_write(word(B11111000,B11111111));}if(tempC > 27) {pf575_write(word(B11110000,B11111111));}if(tempC > 29) {pf575_write(word(B11100000,B11111111));}if(tempC > 31) {pf575_write(word(B11000000,B11111111));}if(tempC > 33) {pf575_write(word(B10000000,B11111111));}if(tempC > 35) {pf575_write(word(B00000000,B11111111));}}void pf575_write(uint16_t data) {Wire.beginTransmission(address);Wire.write(highByte(data));Wire.write(lowByte(data));Wire.endTransmission();}
Arduino PF575 I²C I/O port expander blink example
I got some TI PCF8575 I²C I/O expander devices some years ago and never gave them a try. Yesterday I did... In the title they are named PF575, this is because this is what is printed on the device.
I wrote code for making a LED blink using the I/O expander as simple as possible.
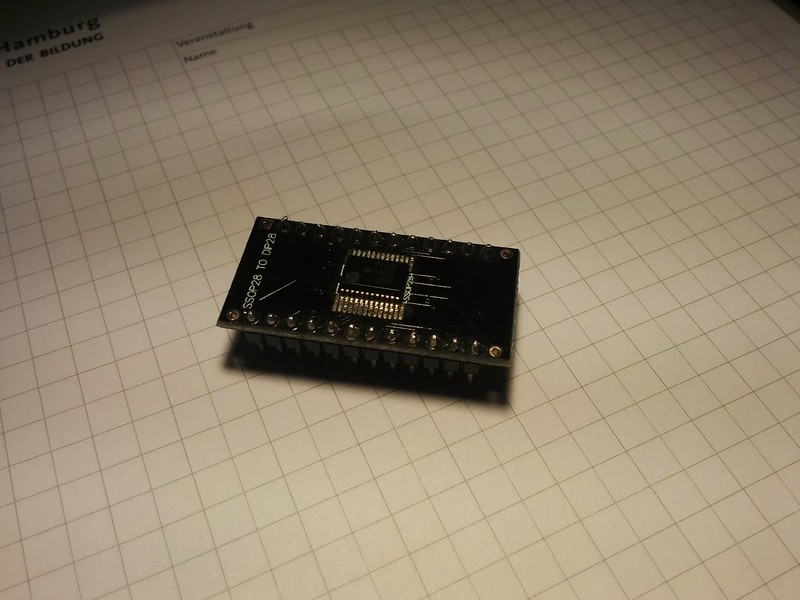
Here you see my setup on a breadboard. On the left is the LED connected via a PNP transistor for voltage control.
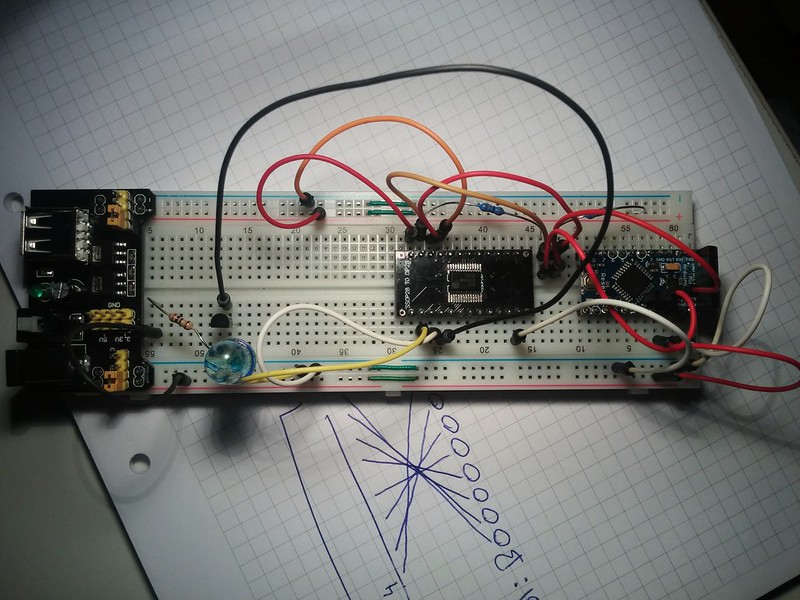
I only had 24-SSOP packages so I needed to solder the PCF8575 to a DIP adapter for making it breadboard friendly.
My code:
#include <Wire.h>/*** Arduino PF575/PCF8575 I2C I/O port exapander LED blink example** Setup:** 1. Connect A0, A1 and A2 to GND to set the address to 0x20.* 2. Connect SDL and SCL to the Arduino's I2C bus.* 3. Connect a LED to the P0 port of the I2C exapander.* In my setup I am using a PNP Transistor connected to 5V using* a resistor, the LED and the Arduino to make sure the LED gets* a current from Vcc and not from the I2C exapander port.** This code is trying to explain how it works as simple as possible.* More detailed examples are found on the web. Search for pcf8575 and* you will find what you want.*/// Set I2C addressint address = 0x20;void setup(){Wire.begin();// Set all ports as outputpf575_write(word(B11111111,B11111111));}void loop(){// Set port P0 onpf575_write(word(B00000000,B00000001));delay(1000);// Set port P0 offpf575_write(word(B00000000,B00000000));delay(1000);}// Function for writing two Bytes to the I2C expander devicevoid pf575_write(uint16_t data) {Wire.beginTransmission(address);Wire.write(lowByte(data));Wire.write(highByte(data));Wire.endTransmission();}
Some links:
Gentoo Zsh prompt with Git features
Some years ago I posted the Gentoo Zsh prompt to make it available to every Zsh user, not only Gentoo users. Some days ago I wanted some Git features in my shell. I saw some nice prompt features in the last years when using Git so I wanted that too. I didn't found a nice prompt so I decided to write my own. I installed oh-my-zsh and created my own theme. It is based on the original Gentoo Zsh prompt and the Kolo oh-my-zsh theme.
Below you see an example session interacting with a Git repository:
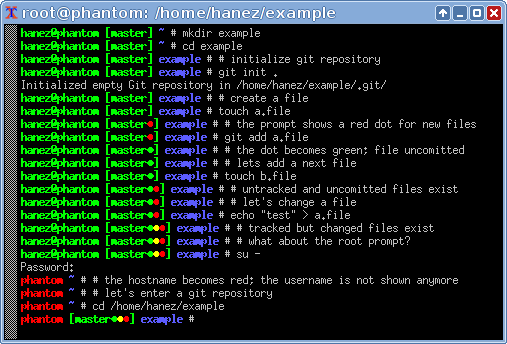
Nice, isn't it?
I love minimal prompts with all the information I need. Since I am using xterm it is compatible to it. I love colors... ;)
You can see here that the [master*] part is not shown when not in a Git managed directory. My $HOME is managed by Git so I always have the repository information available, but not as root.
The code is found in my fork of the oh-my-zsh repository. Take a look under themes/, there is a file named hanez.zsh-theme. You can add this file to any oh-my-zsh installation from the upstream repositories or just add the content of the file to your .zshrc file. I use this fork only for providing my theme.
All of my custom Zsh stuff is found in my $HOME repository at GitHub.
Update: I replaced the dots which are showing the Git status with some asterisk to make the prompt become compatible to more terminal emulators. Some bugs are fixed too.

[Update]: Here is the code:
autoload -Uz vcs_infozstyle ':vcs_info:*' stagedstr '%F{green}*'zstyle ':vcs_info:*' unstagedstr '%F{yellow}*'zstyle ':vcs_info:*' check-for-changes truezstyle ':vcs_info:(sv[nk]|bzr):*' branchformat '%b%F{1}:%F{11}%r'zstyle ':vcs_info:*' enable git svntheme_precmd () {if [[ -z $(git ls-files --other --exclude-standard 2> /dev/null) ]] {zstyle ':vcs_info:*' formats ' [%b%c%u%B%F{green}]'} else {zstyle ':vcs_info:*' formats ' [%b%c%u%B%F{red}*%F{green}]'}vcs_info}setopt prompt_substif [ "$USER" = 'root' ]thenPROMPT='%B%F{red}%m%F{green}${vcs_info_msg_0_} %F{blue}%c #%b%f 'elsePROMPT='%B%F{green}%n@%m${vcs_info_msg_0_} %F{blue}%c #%b%f 'fiautoload -U add-zsh-hookadd-zsh-hook precmd theme_precmd