Blog

Digispark based password store - Passkey

Hello all,

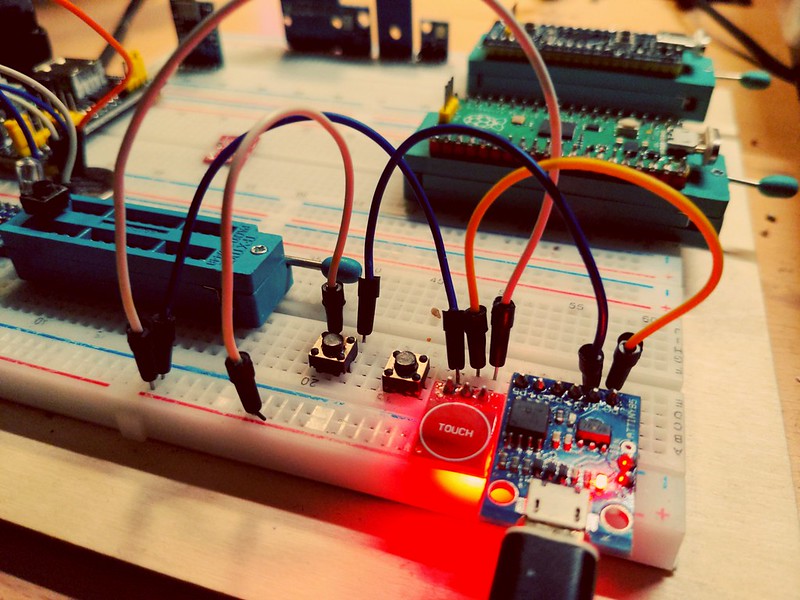
I just started tinkering a bit using an Arduino compatible board named Digispark from Digistump (Since the shop at Digistump is closed actually you have to search for the device on your favorite online marketplaces). I have built this device because I wanted an easy-to-use password store which is cheap and can store more than two passwords like a Yubikey. I really like the Yubikey because it has other nice security features like FIDO2, U2F, Smart card, OTP and OpenPGP 3 protocol support, but they are very expensive if you only want a simple password store. I own three different and also older keys from Yubico just because I wanted to evaluate the different features of all these devices, and I am very happy with them.

Idea

My idea was to build a device with as less code as possible with statically passwords compiled into the binary and acting as a normal keyboard (HID device). The first edition of Passkey just booted and then sent the password to the PC. The second edition got a small button and behaved like the Yubikey. A short press sent the first password, a long press sent the second password. The current and third edition, sends a password after a defined count of button presses. For example, you can edit the code to send a password for the first button press, one for two button presses successively or what ever you decide it should behave. When releasing the last press it takes two seconds to send the desired password which means you need to always have to press the button within two seconds if you want to use more than one presses to get a password. After the last button press the password is printed out after two seconds.

Usage

Just connect the Passkey via USB to your PC and when you will be asked for a password just press the button N times needed for the correct password.

WARNING: Always save your passwords at another secret place, so you can still decrypt, login etc. even when losing your Passkey! I have two Passkeys with the same passwords stored on them where one is stored at a secret place somewhere in this world... ;)

HINT: I always add a prefix or suffix to my passwords which is not stored on the Passkey that I can easily remember for a little more security so when I lose my Passkey all passwords stored on the Passkey are not usable for others. Be sure when using a password suffix, only use "print" and not "println" for getting a password because println will send a newline e.g.: "Enter" / "Return".

HINT: Actually I have problems when using special chars and even when using y,Y,z and Z letters in my passwords because I use my Passkey on several devices with different keyboard layouts. So for me, it only works with numbers from 0-9 and letters from a-x and A-X. But, I think when your password is long enough it should be secure enough. But, if you are using your Passkey in an environment with the same keymap on all devices you should be fine using other chars and letters.

More usage tipps are documented in the code.

Costs

I paid about €3.30 for the Digispark and about €0.30 for the button. Normally I should make use of a Pull-down resistor which will cost some more cents, but for me it works without it.

More ideas and improvements

  • Use the button on pin P5 of the Digispark to make P0, P1 and P2 available for I²C or SPI devices, but I need to re-flash a modified bootloader because P5 is currently configured as RESET pin. Currently, the button uses P0.
  • Add an EEPROM for password storage, but I need to implement a way to store passwords on the device using a serial connection from the PC. Then passwords don't have to be compiled into the binary. I need some kind of management mode for this because by default USB is being used for the HID feature. Maybe I could find a way for implementing this.
  • Delete the passwords in the EEPROM when pressing the button only once. This feature would secure your passwords a little more if you lose your key. So when someone is using your key and presses the button only one time all passwords are erased from the EEPROM.
  • Maybe add an RFID reader via SPI to add more security to only enable getting passwords after enabling the device using a key tag or smart card. Then the device will grow up to a creditcard size.

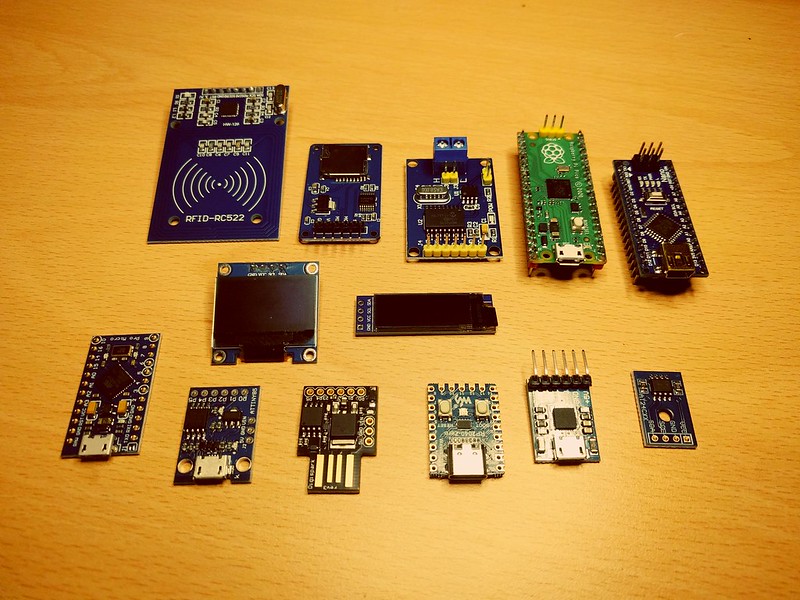
I believe all feature ideas above will not be possible with this device because of the very limited memory available on the Digispark, but I currently don't know because I didn't tried it. Else I maybe find a "bigger" device for my needs. I think about a Digispark Pro (about €10.00) or better a MicroPython based device using a RP2040 microcontroller (about €4.00 to €14.00; different boards are available)...

If you have some more ideas for Passkey I would like you to contact me... ;)

Sourcecode

// Passkey for Arduino using the Digispark Rev.3 board.
// Copyright 2022 by Johannes Findeisen <you@hanez.org>
// Licensed under the terms of the MIT license.

// For using the Blinker library you have to install it from:
// https://github.com/MajenkoLibraries/Blinker
// Since the code is included in Passkey you easily can just copy
// Blinker/src/Blinker.cpp and Blinker/src/Blinker.h to the root of
// Passkey.
#include "Blinker.h"
#include "DigiKeyboard.h"

// The button pin
#define BUTTON_PIN 0
// The LED pin
#define LED_PIN 1
// The pause after last button press before executing a command
#define PAUSE 2000

// Local variables
unsigned long last;
unsigned int count;

// Create blinker object
Blinker blinker(LED_PIN);

// The list of available passwords
// The number and overall lenght of passwords depends
// because the memory of the digispark is very limited...
// I recommend to use a prefix you easily can remember
// for the password/passwords to make the passwords
// on the passkey unusable for others in case you've lost
// your passkey. E.g.: WhatAWonderfulWorld -> then press the button.
const char *passwords[] = {
  // passwords[0]
  "n0Emb871NAQPSIqBoldh8R7UDaNhncF7Pt60Amdo6GWdTdAPwVBi2A3KU8x8DTCRo6GWdTdXNn2wLh3SUbxVWQvFDVPtatDg",
  // passwords[1]
  "oaxt6e3lSgflOuJ3C6Q6sUb5gvmvI5IEPFku5fqcbxJljBOUblHIT121wCu",
  // passwords[2]
  "jUgKGBtiJ0iNN1Ok9vejrXNn2wLh3SUbxVWQvFDVPtat0OxJlKU8x8DTCRo6GWdTdAPwVBi2A3KUrTKQwjUgK",
  // passwords[3]
  "G57dFnXsPUnRq1eC1CjrGxpCjuiJFlDti54W6wBS9Ro6GWdTdAPwVBi2A3KU8x8KGBtiJ0iNN1Ok9vejrXNn2wLhH"
};

void setup() {
  // Set button pin to high.
  pinMode(BUTTON_PIN, INPUT);
  // Set BUTTON_PIN pin to high because the button is connected
  // to GND when pressed and will go LOW
  digitalWrite(BUTTON_PIN, HIGH);

  // Set blink effect (ON, OFF) in milliseconds
  blinker.setDelay(25, 9075);
  blinker.start();

  // Initialize HID
  DigiKeyboard.delay(0);
  DigiKeyboard.sendKeyStroke(0);

  // Light up the LED for a second to show that passkey is ready
  pinMode(LED_PIN, OUTPUT);
  digitalWrite(LED_PIN, HIGH);
  delay(1000);
  digitalWrite(LED_PIN, LOW);
}

void loop() {
  // Start LED blink effect
  blinker.blink();

  // Read button state
  if (digitalRead(BUTTON_PIN) == LOW) {
    // Button is pressed
    last = millis();
    count++;
    // Wait until button is released
    while (digitalRead(BUTTON_PIN) == LOW) {
      delay(1);
    }
  }

  // Wait PAUSE time before executing a command
  if (count > 0 && (millis() - last) >= PAUSE) {
    // The switch case is the number of button presses
    switch (count) {
      case 1:
        DigiKeyboard.println(passwords[0]);
        break;
      case 2:
        DigiKeyboard.println(passwords[1]);
        break;
      case 3:
        DigiKeyboard.println(passwords[2]);
        break;
      case 5:
        // You can use print instead of println if you don't want
        // to hit enter automatically after inserting the password
        DigiKeyboard.print(passwords[3]);
        break;
      default:
        break;
    }
    // Reset the counter
    count = 0;
  }
}

Source: https://git.xw3.org/hanez/Passkey/raw/branch/main/Passkey.ino

Have fun!

[UPDATE]: I added some more editions of Passkey to the Git repository so you should look at the root of my Arduino repository to get new stuff. In the future I will make Passkey a seperate project because I think this way it will be easier to manage the code.

[UPDATE]: Some links updated to go to the Passkey Git repository. Passkey is now a seperate repository.

[UPDATE]: Renamed the project repository from "passkey" to "Passkey". Removed obsolete links.

Permalink: https://hanez.org/2022/12/04/digispark-based-password-store-passkey/

Let Make make things done

Hello,

I was thinking about this blog post since some time now, but I never wrote it because I thought it will be lame. Many of us are using Make but most of us don't know the power for using it every day for easy tasks... I use Make in nearly all of my projects, and it is soo helpful to me.

Now let's Make make things done...!

Sooooo, what is Make?

From the GNU Make website: "GNU Make is a tool which controls the generation of executables and other non-source files of a program from the program's source files. Make gets its knowledge of how to build your program from a file called the makefile, which lists each of the non-source files and how to compute it from other files. When you write a program, you should write a makefile for it, so that it is possible to use Make to build and install the program."

As you can read, Make is built for software developers to build binary files from their code and for this Make is very useful especially when having many source files for building the final piece of software...

But!!! Make is soo powerful to just execute very easy but boring tasks with just one command. So let's say you have to execute a few commands every time you want to execute some repeating tasks in your project, just use Make.

Make is based on makefiles, so you need to create a file named Makefile in the root of your project. You can have makefiles in subdirectories of your project tree, but I will not cover this here because this post is about the most simple usage of Make.

A very simple Makefile is shown below. It creates a file when you in your current working directory just run "make" or "make all". When you then run "make clean" the file will be deleted.

Our first Makefile:

all:
	touch file
clean:
	rm -f file

Isn't it easy?

It is!

A more useful example:

Let's say, you have three commands you need to execute to make a backup of three hosts you are responsible for. Just create a directory where you want to store your "backup Makefile". Just name it what you want. "cd" to that directory and create a Makefile with the content below. When you now run "make" or "make backup" in the new directory, three "rsync" commands will be executed... This is nice because you can define very complex tasks, and they are documented in the Makefile and not only in the shell history. To be honest this example is really very lame, but it shows the power of make for everyday tasks in everyday projects.

backup:
	rsync -av host1.example.com:/ /backup/host1/
	rsync -av host2.example.com:/ /backup/host2/
	rsync -av host3.example.com:/ /backup/host2/

At the end...

Make is soo much more powerful but as I said before I will not cover this here. The most well known project which is being build using Make is the Linux Kernel but even other very important projects like OpenWrt are beeing built using Make. I mention these two projects because they are really using Make to the edge. Since a very long time most C code based projects on GNU (gcc) based operating systems are using Make for compiling their code to executables or libraries.

I use Make every day because I have repeating tasks consisting of more than one command in all of my projects and Make makes it easy for me to handle this. When you have some shell completion and are writing "make " and then hitting the "tab" key in your project root you will also have all "make commands" available you defined in the Makefile.

I am very happy that we can use so many powerful tools for free when using a free and open operating system like GNU/Linux!

I hope this helps you and I wish you a lot of fun when you let Make make your jobs done... :)

Have fun!

Permalink: https://hanez.org/2022/08/04/let-make-make-things-done/

Pages

Page generated at: Nov 10, 2024 (CET) using Jekyll & xw3 on GNU/Linux
NULL
Powered by: NULL