Arduino PF575 I²C I/O port expander blink example
I got some TI PCF8575 I²C I/O expander devices some years ago and never gave them a try. Yesterday I did... In the title they are named PF575, this is because this is what is printed on the device.
I wrote code for making a LED blink using the I/O expander as simple as possible.
Here you see my setup on a breadboard. On the left is the LED connected via a PNP transistor for voltage control.
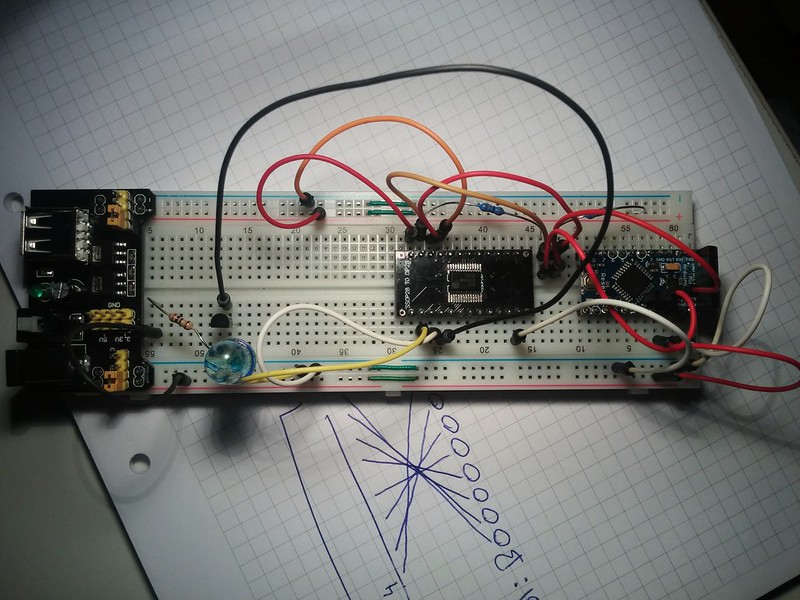
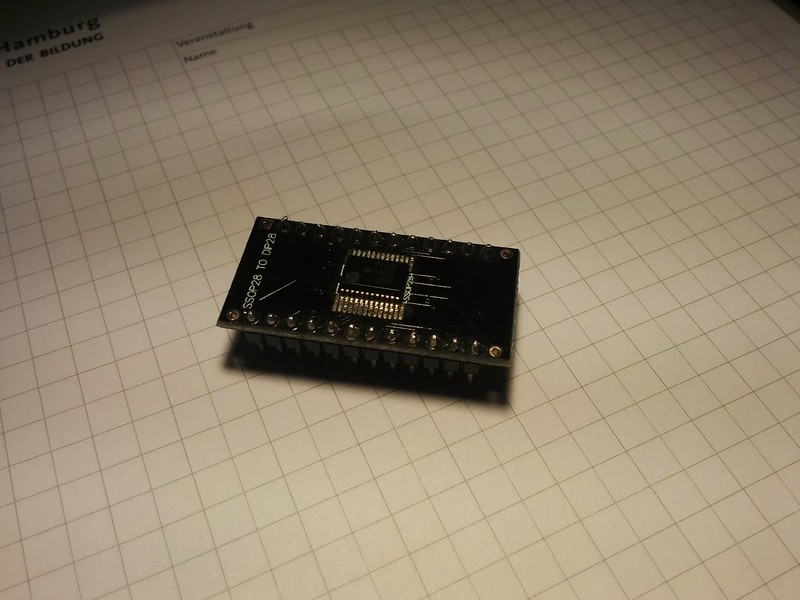
I only had 24-SSOP packages so I needed to solder the PCF8575 to a DIP adapter for making it breadboard friendly.
My code:
#include <Wire.h>/*** Arduino PF575/PCF8575 I2C I/O port exapander LED blink example** Setup:** 1. Connect A0, A1 and A2 to GND to set the address to 0x20.* 2. Connect SDL and SCL to the Arduino's I2C bus.* 3. Connect a LED to the P0 port of the I2C exapander.* In my setup I am using a PNP Transistor connected to 5V using* a resistor, the LED and the Arduino to make sure the LED gets* a current from Vcc and not from the I2C exapander port.** This code is trying to explain how it works as simple as possible.* More detailed examples are found on the web. Search for pcf8575 and* you will find what you want.*/// Set I2C addressint address = 0x20;void setup(){Wire.begin();// Set all ports as outputpf575_write(word(B11111111,B11111111));}void loop(){// Set port P0 onpf575_write(word(B00000000,B00000001));delay(1000);// Set port P0 offpf575_write(word(B00000000,B00000000));delay(1000);}// Function for writing two Bytes to the I2C expander devicevoid pf575_write(uint16_t data) {Wire.beginTransmission(address);Wire.write(lowByte(data));Wire.write(highByte(data));Wire.endTransmission();}
Some links:
- PCF8575 Datasheet at ti.com
- Tutorial: Arduino I/O Port Expander with PCF8574
- Using The PCF8575 i2c i/o Expander To Read Inputs With Arduino
Permalink: https://hanez.org/2015/09/23/arduino-pf575-i2c-io-port-expander-blink-example/