Blog
This is a private homepage... ;)
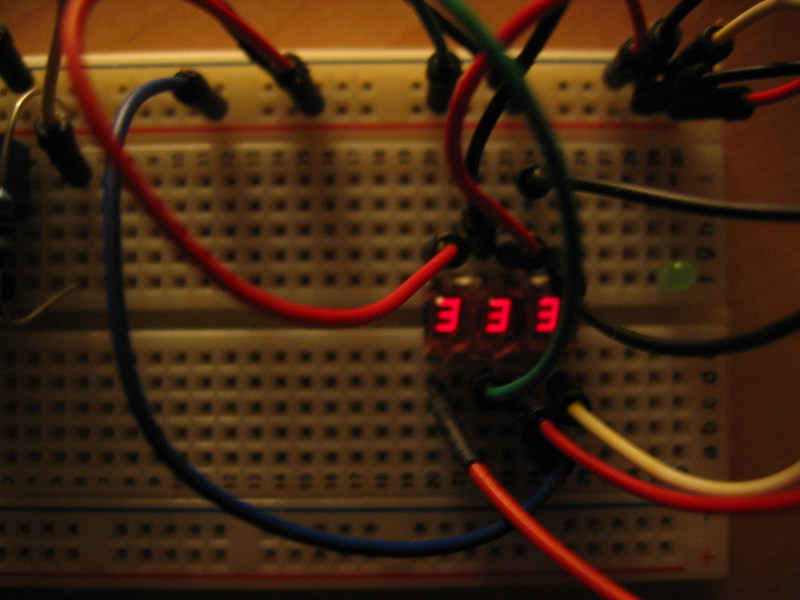
HP 5082-7433 7 Segment LED Display
Rafael and I found this 7 segment LED display tonight while tinkering a bit. We didn't knew what it is at first but after searching around the web we found out that it was a very vintage 7 segment LED display with 3 digits... ;) It is a HP 5082-7433.
Arduino Motion Sensor Server
I tinkered a little bit this evening and I have added a motion sensor to the Arduino platform. After that I added a network shield and have coded a small HTTP server... This server provides just a 0 or an 1. 0 if I don't have moved around; 1 if I am dancing on the desk... ;) The sensor works with a radius of about 5 to 7 meters and it is really a lot of fun. You could get such sensors very cheap at ebay, just search for "arduino motion sensor".
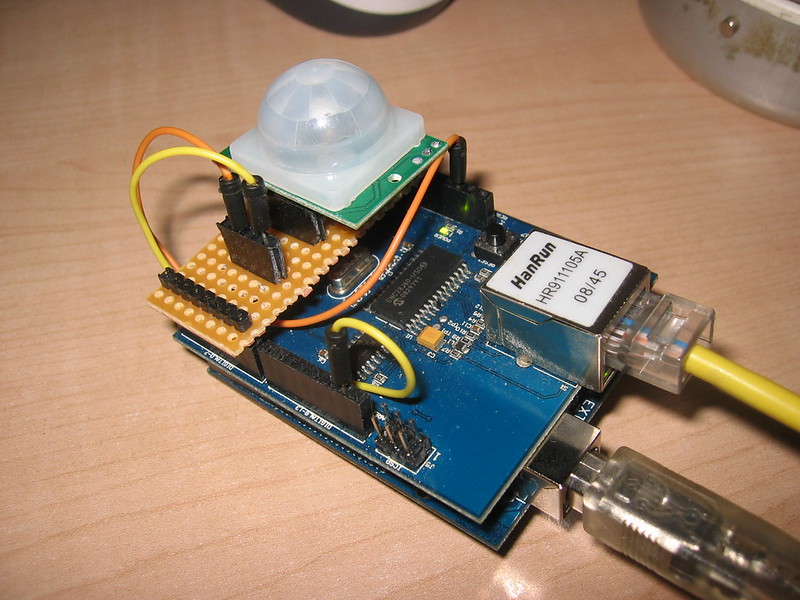
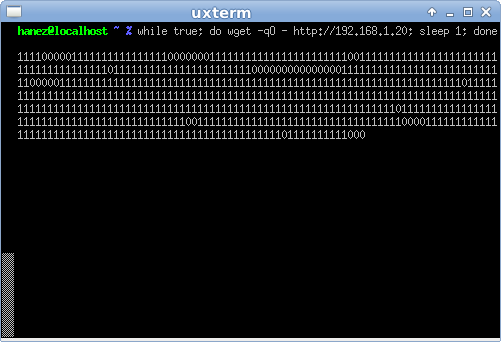
I am getting the status every second using wget and are displaying the output in xterm. It looks nice to see how much I am moving when writing this Blog post:
Danmark
I was on holiday in Denmark last week. It was a great time. Since I was on a danish school, I were there many times in my youth. I felt very well @home... ;)

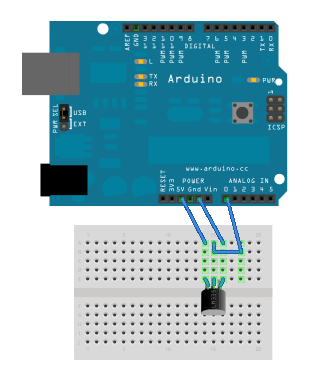
Arduino LM35 temperature sensor
I am ill today and needed to distract me some bit.
I added a LM35 temperature sensor to my Arduino. Since someone did the work already, I only needed to copy some code and setup the wiring on a breadboard. I used the same wiring like in the link. Below is an image of the wiring made with Fritzing. I am using a LM335 for this because there where no LM35 as a Fritzing part available...
I changed some parts of the code to only print the temperature as String to serial. In the original code the data was sent as (byte) over serial to read the value with an application created using Processing. Feel free to change this again... ;) This is the code I used:
float temp;int tempPin = 0;void setup(){Serial.begin(9600);}void loop(){temp = analogRead(tempPin);temp = temp * 0.48828125;Serial.println(temp);delay(1000);}
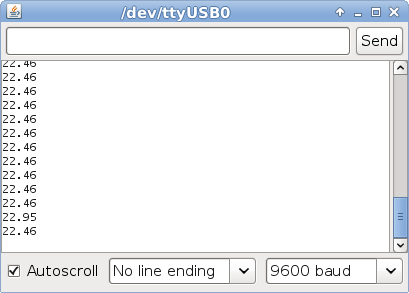
My output in the serial monitor of the Arduino IDE looks like this:
Alex' Tiny2313 Header Board
I got this nice Tiny2313 header board on Friday from Alex. Thanks for that nice piece of work!
It seems that I bought the last ones because there are currently no more of them in his shop available... :( But I think you could get one in the near future again. If not take a look at his site. All code and schematics are freely available there.

Soldering was a lot of fun and very easy to do. After successful soldering I build the small circuit at the end of the howto and flashed the microcontroller using the Makefile provided by Alex. I needed to change some things to make it work right on my Linux box using avrdude and the Atmel AVRISP mkII.
I changed the PROGRAMMER line to:
PROGRAMMER = -P usb -c avrispmkIIIf you even get errors, try to add the parameters "-F" and "-D" to $PROGRAMMER. Call "avrdude --help" to get a description of these parameters... ;)
Don't forget to add an external power supply to the header board since the AVRISP not seems to provide enough power. I got strange errors in the output of avrdude. After adding more power everything worked as expected.
The result: A blinking LED. Yeah! :)